Setup for Special Module
Linsn LED display control system supports different kind of LED displays and provides a easy way to set up special module
Setup for Empty Pixel
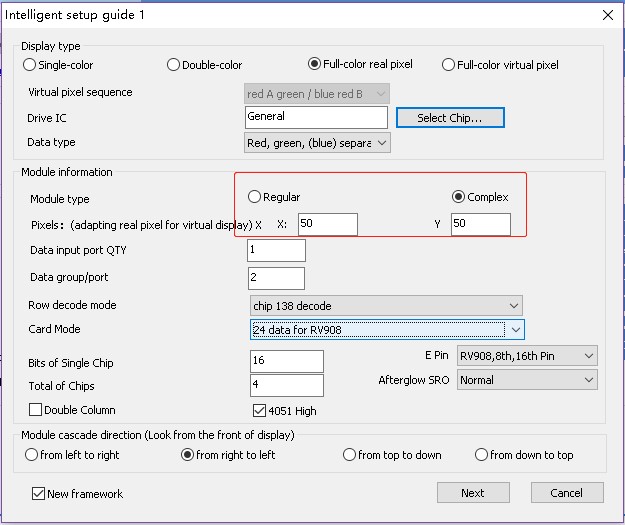
1. Check the pixel dimensions for one module, model of driver IC and decode IC
2. Click Intelligent setup button after getting the correct info of your module.
(Take module size with 50*50 pixels for example)
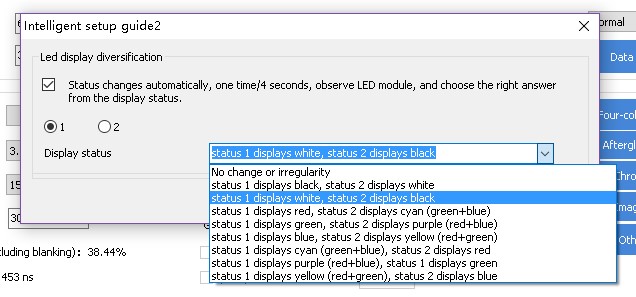
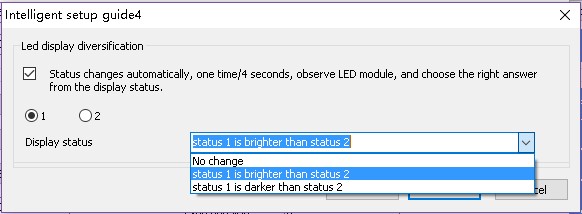
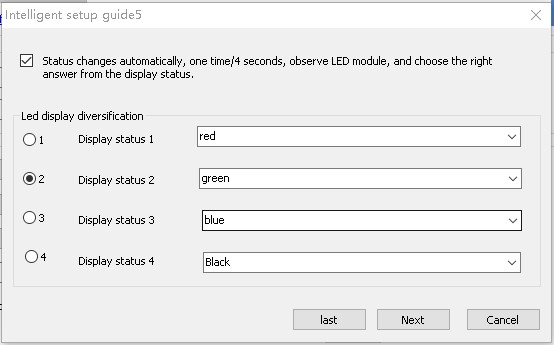
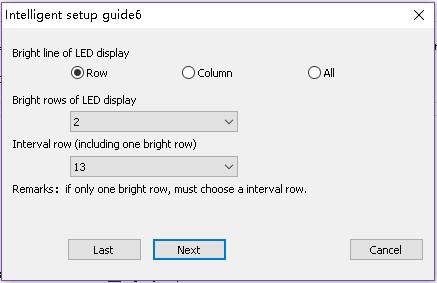
3. Choose the corresponding Display Status from Guide2 to Guide6 interface
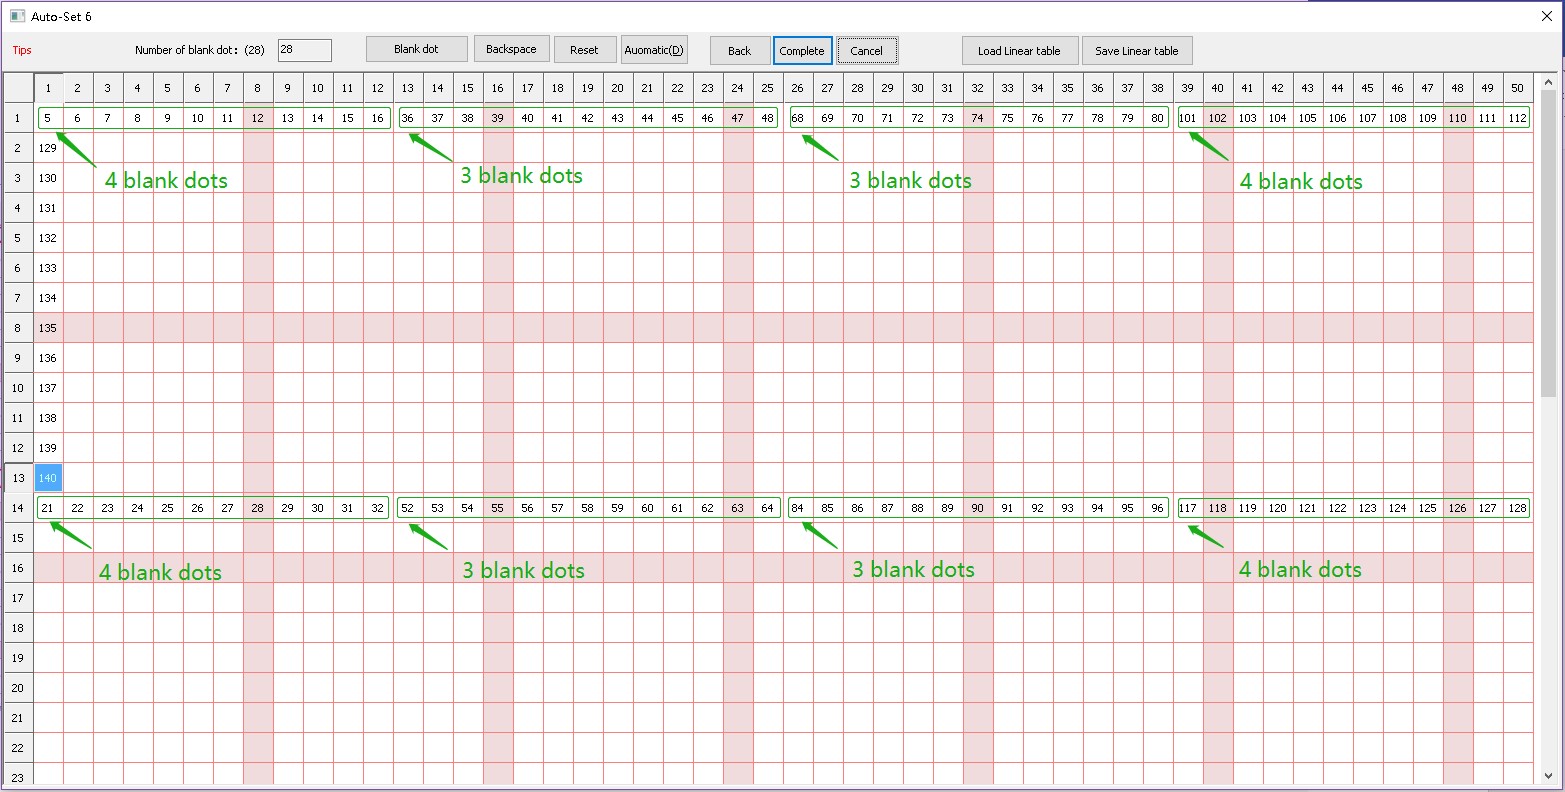
4. Locate the blinking pixel on the module and click once on the corresponding position in Guide7. If no new blinking pixel appears, click the blank dot button. Click finish if all the blinking pixels have been marked in Guide7.
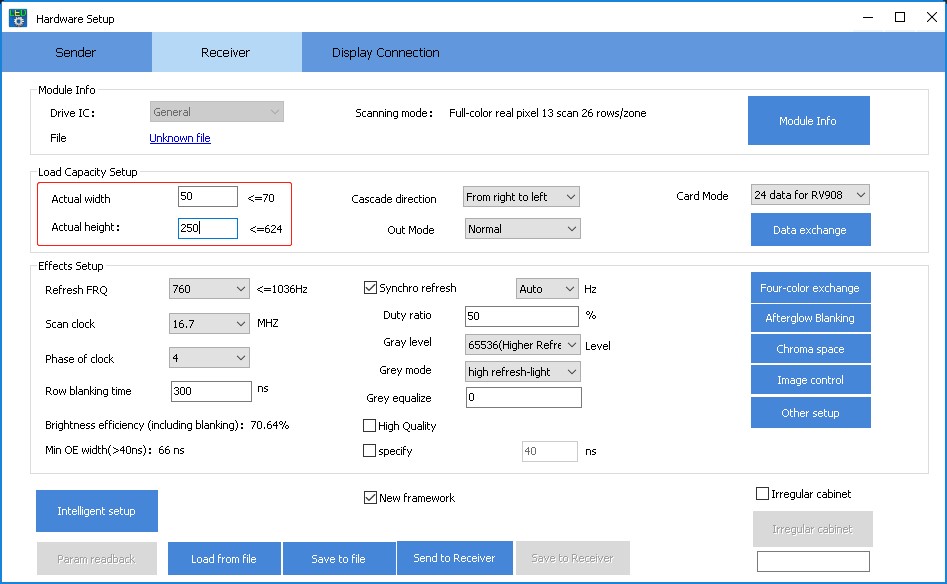
5. After turning back to the Receiver Tab interface, modify the actual width and height value depending the actual width and height that one receiving card connects to.
Setup for Empty Row
If you can’t get a whole number when dividing the pixel height of the module by the scan mode, it means the module is with empty row. Like module with 50*50 size, scan mode is 13-scan, 26-rows-for-each-section. Divide 50 by 13, you can’t get a whole number. And 13*2-1=25, so you will know one row has been removed. You need to go into the hidden manual to adjust the values.
Modify item247 to 1
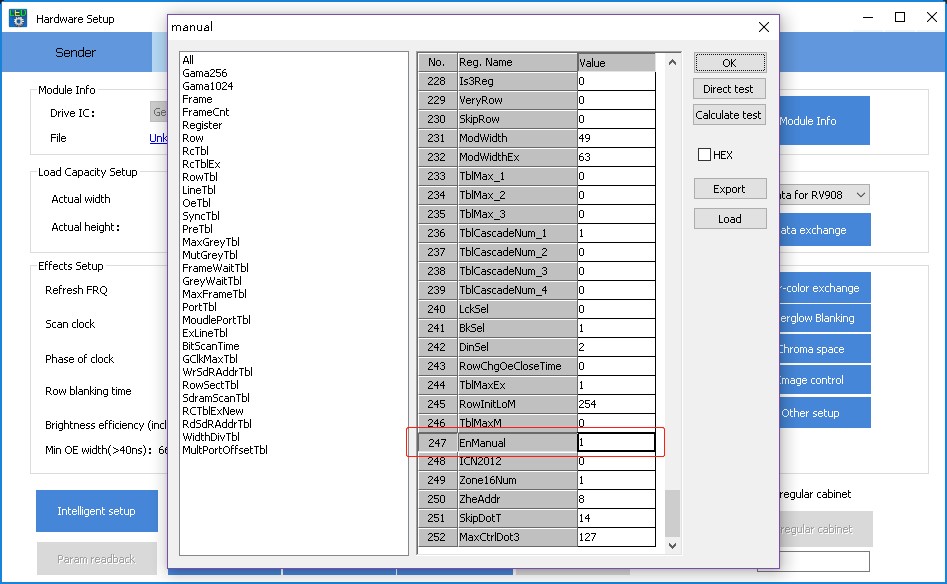
In normal case, set each data set to 26 (0 to 25th, and 0 is the first row) rows in RowSectTbl . But in this case one row has been removed, you need to modify 25 to 24.
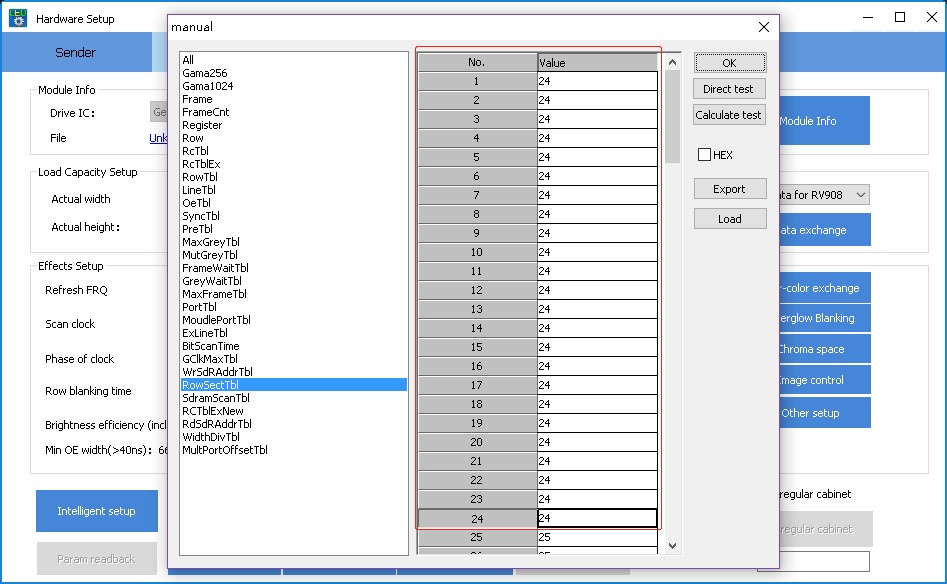
Because 24 sets data group are used here, so we modify 24 sets.
After the above steps, click send to receiver to see the reaction on the display.